DIY Treasure Chest Toy Box (Hand Painted)


Children will love discovering the treasures in this personalized wooden DIY treasure chest box that is hand painted with chalk paint! It’s perfect for birthdays, treasure hunts, pirate plunders, or use as a fun toy storage box.

One of the best presents I have ever made my kids was a DIY LEGO Play Station tray table for Miss Jade’s birthday years ago. It has been her favorite toy year after year. Because her brothers were jealous of it, I also made all the kids their own DIY Travel LEGO Table.
Year after year, our homemade presents have been their favorite gift. And my kids absolutely LOVE them and treasure them.
Our kids treasure chest toy box is no exception. I made this wooden treasure chest in 2018 for my daughter’s birthday, and it is still used to store her Playmobil toys to this day. It is loved and treasured and used every day.
❤️ Why it works
I designed this painted treasure chest to easily be personalized for whatever interests your child. But there are several more reasons why you will love this personalized kids treasure chest!
- Easy DIY project. This is an excellent project for beginners or those who don’t have a lot of time.
- Makes an excellent gift. As I mentioned, homemade gifts are always a hit. This makes it more personal and treasured. And unlike the cardboard versions on the internet, this wooden treasure box will last year after year after year.
- Toy Storage. These DIY treasure chests make an excellent toy box for small toys. It will help with organization. It also makes it really easy for my daughter to transport her toys around to different areas of the house when she wants to play.
- Personalized. You can easily change it up to fit your child’s personal tastes by choosing a different color, and different letters. You can use different letters for their name, a LEGO storage box, toy cars, doll clothes, or decorate it as a Pirate treasure box.
- Fun Kids Craft. If you want to take it a step further, let your kid do the painting! It may not look as polished or professional, but they will love the activity.
- Fun Pirate Party Favors! If you are hosting a pirate-themed party, get a selection of small wooden treasure chests and let the kids each paint their own as part of the party activities. At the end of the party when they are dry, fill them with fun pirate party favors for each kid to take home.
I made this treasure chest toy box when my girls discovered the old Playmobil toys that I have been storing since when I was a little girl.
These toys are treasured and the girls are completely in love with them. They ask to play with them all the time.


The only problem is that the storage box was getting worn out. I mean, this storage tin is older than I am!
I didn’t want my girls getting hurt on the sharp corners. And I wanted something a little easier for them to get into and carry around from room to room. This hand-painted DIY Wooden Treasure Chest Box was the perfect solution for our treasured creative play toys!

🎨 Supplies Needed
Some of the links below are Amazon and other retailer affiliate links, which means that I will receive a small commission if you make a purchase through them. This helps me to keep this blog running and to provide you with free content.
You will need:
- An unpainted wooden chest (or one that can be repainted) See our Tips below for the best places to find a wooden chest.
- Chalk paint in your color choice. (DecoArt is my favorite brand, but FolkArt and Waverly are also good brands.)
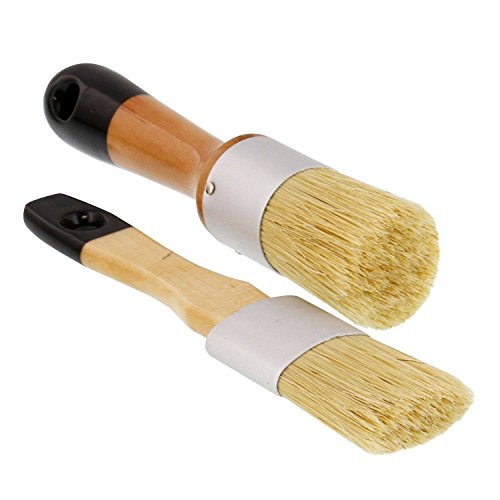
- Paint Brushes. At least one large paint brush approximately 2-3″, and one small fine-tipped paintbrush for detail work.
- Newspaper or painters plastic.
- Painters Pyramid
- Course Sand Paper
- Antiquing Wax
- Wax Brush
- Krylon Crystal Clear
- Wood letters (optional)
- Gorilla Wood Glue (optional)
I’ve used foam paint brushes before. They are cheap and easy. Use it, and then toss it. Don’t worry about washing it out. But, the downside is that they do wear out a lot faster than a regular paint brush and I end up using an entire package before the project is complete.
For this project, I used a purdy premium brush and it was a breeze! I also used a very petite detail brush.
🥽 Method – Making a Wooden Treasure Chest
👩🏻🎨 How to Paint
Step 1: Set your painter’s plastic down to protect any surfaces. Set up the painter’s pyramids. Gather all of your supplies. And now we can begin!

Step 2: Place the wooden treasure box on the painter’s pyramids. The pyramids allow the box to remain off of the table so you are better able to paint all the edges without making a mess. it also prevents the box from sticking to the table surface and allows you to also paint the bottom and allow for airflow all around for drying.
Paint the outside of the wooden treasure chest box the main color of chalk paint. Be careful around any accents, bindings, hinges, etc, so you don’t get paint on those.
I go over the entire box first with the larger paintbrush. And then follow up with the detail brush to get closer to the metal parts.

Step 3: Apply a 2nd coat of chalk paint to the outside of the wooden treasure box. By the time you have finished the first coat, the spot where you started will be dry and ready for the 2nd coat.
You don’t have to do two coats. But I found it gives a richer color than a single coat. But really it’s your choice.


Step 4: After you complete your second coat, allow it to dry for 10-15 minutes. This is a great time to put the paint away, wash the paintbrushes, and grab a quick snack.
If you want your wooden treasure chest box to look brand new, you can skip to the sealing of the treasure box. But if you do want an antique look, keep following along.
Step 5: Take a small course sandpaper and begin to antique (sand) the edges of the wooden treasure chest box. This will remove some of the paint, giving it a nice worn/antique look.

Step 6: After you have sanded the edges, pick spots on the wooden treasure chest box that would likely get “beat up” or worn after years of use. Use the sandpaper on these spots too. You don’t have to go as heavy on these spots as on the edges. Just let your creativity and inspiration be your guide.


Step 7: Dry Brush to antique. Now you will dry brush the antique wax on your wooden treasure chest box. Dry brushing is a technique that means the brush is almost dry with very little on the brush.
🖌️ How to Dry Brush a Wooden Chest
Dip just the tips of the wax brush into the antique wax.

Wipe the paint off of the brush onto a piece of cardboard or plastic, until only a very small amount remains on the brush.

Lightly drag your brush over your painted surface where you want to add an antique look.

The harder you brush the more the antique wax will blend. In some spots you might want a darker antique look and in others a much lighter antique look.


To get the light look, blend, blend, and blend some more over those areas. They will become lighter and not as harsh.

You might also want to antique the inside of the box. Often times the inside of the box gets forgotten. But I like to make it match the outside. So I simply applied the antique wax to the inside of the box and lid.


After you have finished the entire box with the antique wax, you will let it sit for another 10-15 minutes to dry.
💎 Sealing the Treasure Box
With the paint all dry it is time to seal the wooden treasure chest box.
Why Seal?
This will help the paint and color to last longer and protect against sun exposure, scrapes, and hard use.
I like to use Krylon Crystal Clear. It leaves a soft glossy finish to the project and seals the wood and paint.

Take your treasure chest outside and prop it on the painter’s pyramids. Give a light coat over the entire box. Including the inside.
After about 10-15 minutes, you can apply a second coat if you wish.
Allow to dry for a few hours before handling.

If this is all you want to do with your treasure chest box, then you are done! Wahoo!
🔠 Personalize the Treasure Chest
If you want to make the Wooden Treasure Chest Box extra special, you can add personalization.
For the LEGO box, I added wooden letters that spelled out LEGO.
On Jade’s LEGO table, I used vinyl letters to spell out her name – JADE
For this toy treasure box, I wanted it labeled so the girls know what toys are allowed inside. And to keep these treasured toys from getting lost. So I made this a Playmobil Treasure Chest!

You can use wood letters or vinyl or even stencils to personalize the treasure chest. It’s really up to you.
I used 3D wooden letters. A good size would be between 2-3″ wooden letters.

Place each letter on the treasure chest in the pattern you desire.

Doing one letter at a time, lift it, put a little Gorilla Wood Glue on the back, and place it back onto the treasure box.

Allow the wood glue to fully dry (overnight preferably).

Now you can fill your Wooden Treasure Chest box with whatever treasure or toys you want.
For my girls, we added another small treasure chest inside to hold the little pieces, and then we placed the rest of my childhood Playmobil toys inside, as well as the new sets they currently have.

But you can use it for any kind of treasure you want. Or even as the treasure chest for a kids Pirate birthday party or treasure hunt!

⏳ Time-saving Tips
Now I know many DIY projects have you cutting wood and piecing it all together completely from scratch. Sorry, this is not one of those.
Due to time restraints and my ADHD, my projects have to be easy and be completed in only a few hours time. So this DIY Wooden Treasure Chest Box project has a few “shortcut” steps. Things that make it a little easier and faster. This way even a novice creator can accomplish this Wooden Treasure Chest Box.
Tip 1 – Find the treasure box!
This is the biggest shortcut. Find a treasure box that appeals to you. It can be square, circular, hexagon, or even the standard Pirate Treasure chest design.

Places I often look for boxes like this include:
- Thrift stores
- Dollar stores (sometimes)
- Craft stores
- yardsales
- Hobby Lobby
- Michaels
- Joann
- Amazon
- Walmart
It doesn’t have to be brand new. Since we will be painting it, all you need to worry about is it being sturdy and durable. And it will need to be from some kind of wooden material. Fabric won’t work.
Tip 2 The Paint
Most projects use acrylic paint. And that paint is fabulous. I love it and use it on other projects. But for this wooden treasure chest, I prefer using Chalk paint. Not chalkboard paint, but actual chalk paint. There is zero prep work, no sanding before you begin, and it dries much faster than acrylic paint. Thus saving time and effort.
For this step, the hardest part will simply be choosing which color you want for your wooden treasure chest box. To make it easier, don’t choose a color until you see what is available in chalk paint.

After you pick your paint color, you’ll need to decide if you want your treasure chest toy box to look brand new, or have a vintage farmhouse look. We’ll cover this later on.
Tip 3 – Set the workspace.
We will be painting the wooden treasure box, and there will be a step where we are outside spraying a sealer on the box. So if there is anything else you feel you need in addition to what I list in the supplies, feel free to get ready now.
To make this project go smoothly and quickly, I always get my workspaces ready before I begin. I have a painting drop cloth on the table. All the brushes are ready to go. The paints are opened and mixed. I also have the letters laid out, sandpaper squares ready to go, and a place to allow the box to dry.
💭 FAQs
The options are endless. If you are using it for pirate plunder, you can add beads, gems, and jewels from craft stores and flea markets. It can be used for toy storage, think Playmobil toys, LEGO toys, toy cars, doll clothes, etc. Or you can use it to store art supplies like stickers, markers, crayons, pencils, etc.
No. You can also use Acrylic paint. I prefer chalk paint because it makes the project easier and faster. Chalk paint goes on smoother and doesn’t require any prep work. But you can use any acrylic craft paint if you desire.
This depends. The size you want will depend on the purpose of your treasure box. How much do you want to store inside? A 3.5″ wooden chest is great for party favors or a kid’s craft. If you want any kind of storage option for specific small toys, a larger 10-15″ wooden chest is ideal.
🛠️ More Easy DIY projects
Remember to pin this DIY Treasure Chest Toy Box to Pinterest!
Use the button on the Printable create card or the share buttons on the side or bottom of this page.
DIY Treasure Chest Toy Box For Kids

Whether you're playing pirate or you just need somewhere to hide away treasured toys, this customizable DIY Treasure Chest will be cherished for years to come. This wooden treasure chest is Hand painted with chalk paint, and is simple enough even for beginners.
Materials
- An unpainted wooden chest
- Chalk paint in your color choice.
- Course Sand Paper
- Antiquing Wax
- Krylon Crystal Clear Spray
- Wood letters 2-3" size (optional)
- Gorilla Wood Glue (optional)
Tools
- 1 large paint brush approximately 2-3″
- 1 small fine-tipped paintbrush for detail work.
- Wax Brush
- Newspaper or painters plastic.
- Painters Pyramid
Instructions
- Set your painter’s plastic down to protect any surfaces.
- Set up the painter’s pyramids. Place the wooden box onto the painter's pyramids.
- Gather all of your painting supplies.
Paint The Wooden Treasure Box
- Paint the outside of the wooden treasure chest box with chalk paint. Paint all sides of the outside including the bottom. Do not paint the inside.
- Use the large brush for the major sections. Use the small detail brush around any hardware/hinges, clasps, etc.
- Apply a 2nd coat of chalk paint to the outside of the wooden treasure box.
- Allow the paint to dry for 10-15 minutes.
- Take a small course sandpaper and begin to antique (sand) the edges of the wooden treasure chest box.
- After sanding the edges, use sandpaper on other areas of the wooden treasure chest box that would likely become worn or damaged over time.
Dry Brush Antique Wax
- Dip just the tips of the wax brush into the antique wax.
- Wipe the paint off of the brush onto a piece of cardboard or plastic, until only a very small amount remains on the brush.
- Lightly drag your brush over your painted surface where you want to add an antique look.
- The harder you brush the more the antique wax will blend. The more you blend the more the antique look will be softer.
- Dry Brush the inside of the box to antique the inside.
- Let the box sit for 10-15 minutes to dry.
Seal the Treasure Box
- Take your treasure chest outside and prop it on the painter’s pyramids.
- Give a light coat over the entire box with Krylon Crystal Clear acrylic coating. Including the inside.
- After about 10-15 minutes, you can apply a second coat if you wish.
- Allow to dry for a few hours before handling.
Add Letters
- Place each letter on the treasure chest in the pattern you desire.
- Doing one letter at a time, lift it, put a little Gorilla Wood Glue on the back, and place it back onto the treasure box.
- Allow the wood glue to fully dry (overnight preferably).
Fill your Wooden Treasure Chest box with whatever treasure or toys you want.
Notes
Finding the Treasure Box: Find any treasure box that appeals to you. It can be square, circular, hexagon, or even the standard Pirate Treasure chest design. I often look for boxes like this including thrift stores, dollar stores (sometimes), craft stores, and yardsales. It doesn't need to look pretty, only that it is sturdy and in good structural condition.
Paint Choice: For this wooden treasure chest, I prefer using Chalk paint. Not chalkboard paint, but actual chalk paint. There is zero prep work, no sanding before you begin, and it dries much faster than acrylic paint. Thus saving time and effort.
Recommended Products
As an Amazon Associate and member of other affiliate programs, I earn from qualifying purchases.
-
 Deco Art ADC-21 Americana Chalky Finish Paint, 8-Ounce, Legacy
 -
Deco Art ADM8-07-36 Americana Decor Creme Wax, 8 Fl. Oz, Deep Brown
-
10Pcs Miniature Paint Brushes, Detail Fine Tip Paint Brushes Set with Ergonomic Handle - Suitable for Acrylic Painting, Oil, Watercoloring, Face, Nail, Scale Model Painting, Line Drawing
-
U.S. Art Supply 2-Piece Multi Use Oval and Round Chalk, Wax and Stencil Brushes for Chairs, Dressers, Cabinets and Other Wood Furniture - 100% Natural Bristles, Lightweight and Rust Resistant
-
1" Purdy 144080310 XL Dale Angled Sash Paint Brush, Tynex Orel
-
Krylon K01303007 Acrylic Spray Paint Crystal Clear in 11-Ounce Aerosol, Gloss Large Can, 11 Ounce (Pack of 1)
-
U.S. Art Supply Yellow Cone Canvas and Cabinet Door Risers - Acrylic and Epoxy Pouring Paint Canvas Support Stands (Pack of 20) Great to get Your Canvas or Cabinet Doors Pyramid Triangle Risers
-
3 Inch 56 Pieces White Wood Letters Table Standing Alphabet Letters for Crafts Wedding Party Home Decor
-
Gorilla Wood Glue, 4 Ounce Bottle, Natural Wood Color, (Pack of 1)