This post may contain affiliate links, such as Amazon, Please read my disclaimer.
Top 5 Tips and Tricks for Crafting
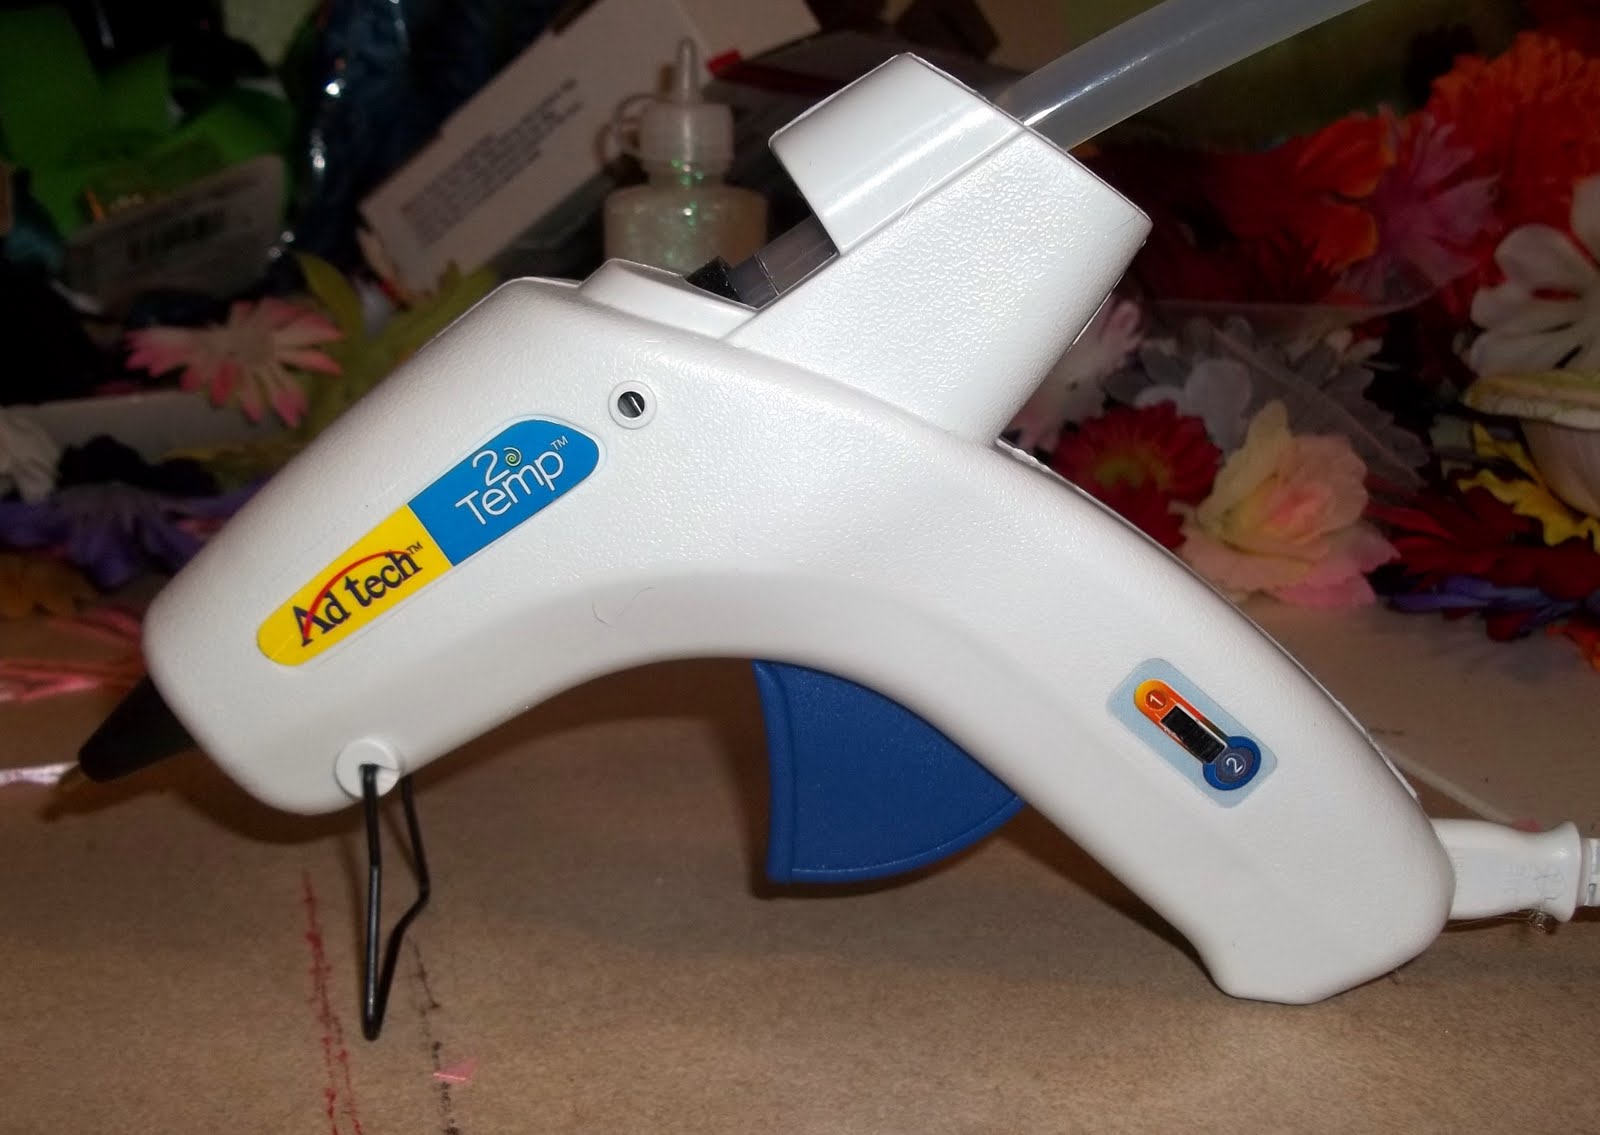
Tip #1: I’ve seen it over and over again, An adorable craft, made with Hot glue, but then it falls apart in a week to a month. A trick I found that helps with this is using the warm to Hot setting on the glue gun. You want the glue hot, but not so hot that it burns you on contact. I’m not a science wiz, so I can’t tell you WHY it works..only that through my experience, it HAS worked. In my experience, the Low temp. Glue guns work, but they don’t heat the glue up enough to form a strong bond. Most items I had crafted with a Low Temp. Gun did not hold together for more than a month or two. Especially if you lived in an area that gets very warm. The hot glue on the item would warm up just enough from the normal temperatures that the bond/seal between the fabric or trimming, etc would soften and the craft fell apart. My favorite gun is my 2 temp (Medium and Hot) Glue gun. The low setting is warmer than a Low Temp gun and when items are glued together, it forms a very sturdy bond that is not easy to pull apart. But I then also have the Hot setting for when I need a heavy duty bond. You don’t need a really Expensive Gun. I got mine at Walmart for less than $12
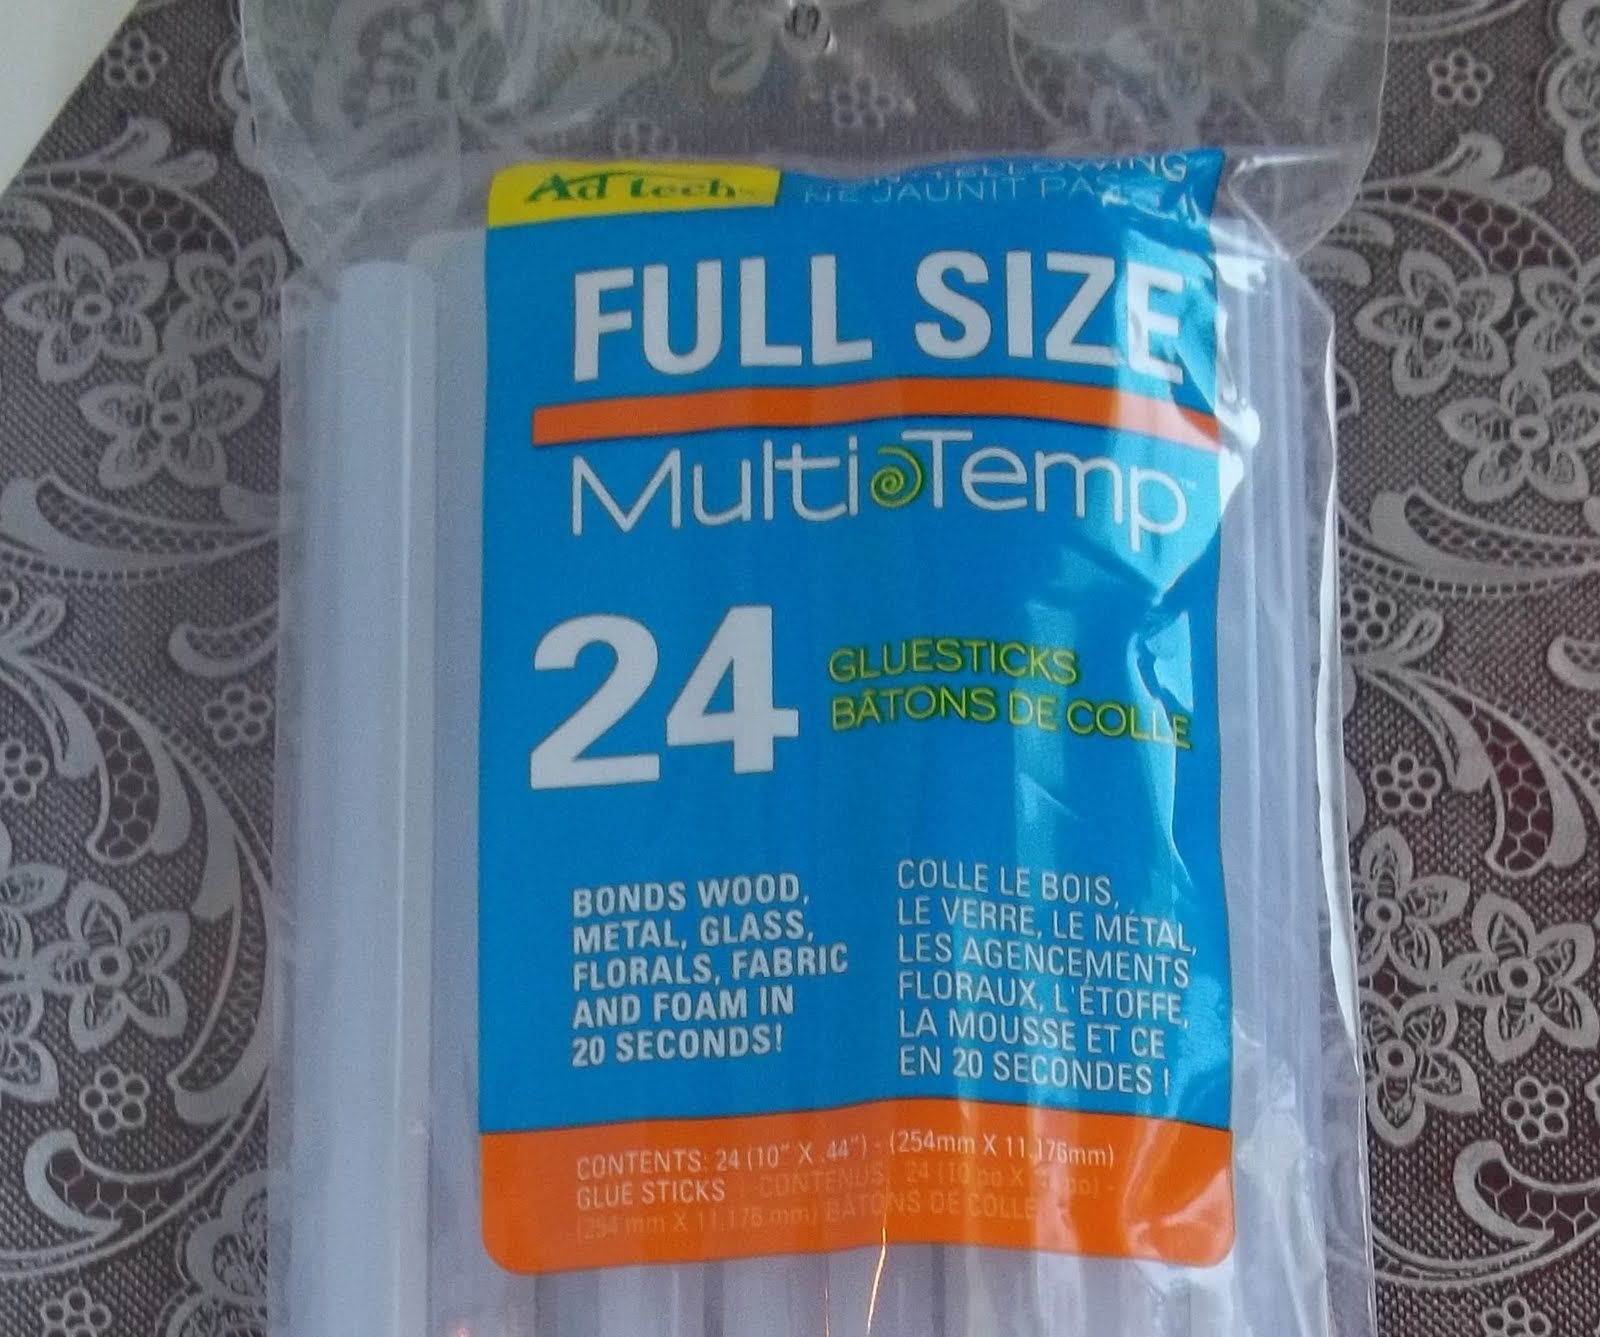
Tip #2: One thing I hear and have experienced all the time, is the IRRITATING strings left behind by a Glue gun. This little trick I found, has been a dream come true! Although it doesn’t eliminate the strings, it has Dramatically reduced the amount I have to deal with. First, you want to be sure you are buying the CLEAR glue sticks. They are easy to find at Walmart, Joanns, Hobby Lobby, Michaels, etc. And they don’t cost very much. Glue Sticks that have a more solid color to them are more likely to leave Strings. Second, I always keep a little jar of Vaseline near by. When the strings get noticeably bad, I just dip the tip of the glue gun into the Vaseline, and it dramatically cuts down on the amount of strings I have to deal with afterwards.
Tip #3: RIBBON! Do you use ribbon? whether you are making Hair bows, or just cute bows to decorate anything, or just trimming another craft, the hardest thing with working with Ribbons is that they fray! The most common known way to eliminate this is to “heat seal” the ends of the ribbon after it has been cut. The Most common way to do this is with a candle or a lighter, and just quickly and gently brush the edge of the ribbon across the heat and you will SEE the ends seal themselves. This method is great when you are doing little projects, but when you are going to be using, cutting and sealing a lot of ribbon it takes quite a while. I found a way to make it go much faster! Believe it or not I use a Wood burner. They are fairly easy to find, I found mine again in Walmart and it was $10. It doesn’t need to be fancy, just so long as it works and it has a narrow tip. You will want a solid working space that will not melt itself when you use the wood burner on it, because it gets VERY hot. I simply use a bathroom/floor tile that was left over when we remodeled our entry way in our home. It is large and it withstands the heat from the wood burner. You then measure out the ribbon to the length you need, and then gently brush the wood burner across the ribbon where you want it cut. It is so hot it will cut nicely and heat seal the ribbon all in one easy step. This is a HUGE time saver for me when I have to cut a lot of ribbon.
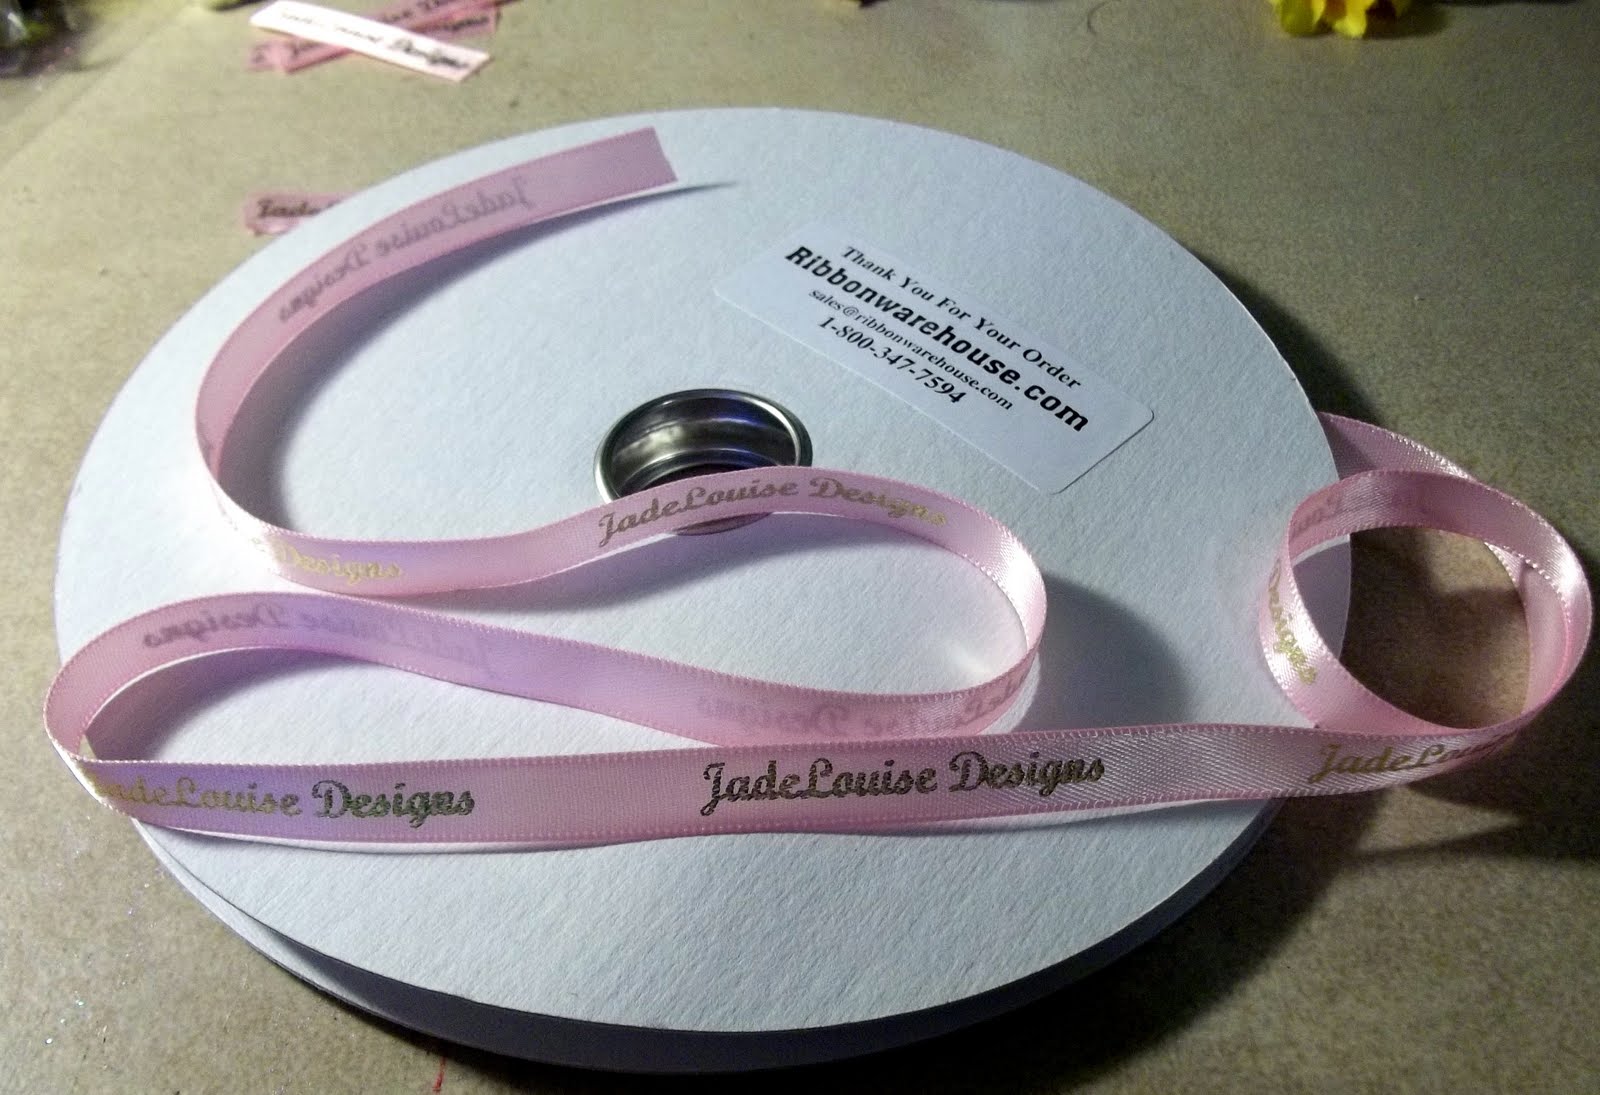
Tip #4: Labeling! Just consider this, Go look at all the adorable crafts, hair accessories, etc etc that you have purchased over the years…can you tell me where you got each and every one? This is VERY important if you are a Boutique that makes and Sells items. The likely hood that someone will purchase your item and remember that it came from you is a tremendous factor in whether they will RE-order from you in the future. I See people posting on Facebook ALL the time, “I bought this adorable outfit/hairbow/ flower, etc from a boutique online…does anyone know where I got it from? I love it, but I can’t remember and I want to order more!” I have the same problem. I was just in Jade’s room looking at all her cute stuff and thinking, I haven’t a clue where most of this came from. So, if I can’t remember, how can I expect my Fans, customers to remember? So, a little trick, Label your products with your Boutique/business name so they will know what items came from you, so they know who to go to for future purchases. The easiest way is to attach a cute ribbon to your item that has your boutique’s name o
n it. I purchase my Ribbon from Ribbonwarehouse.com I get it personalized, in the colors I want. It comes neatly rolled onto a ribbon spool and ready for you to use. Then you can cut off each label length and it is ready to use.
Tip #5: Last but not least.. Have you ever made the cutest craft from ribbon or fabric, only to have it get smashed and lose its shape? That is where our last tip comes from. ESPECIALLY if you are making anything that will be shipped, it is very important that you “stiffen” the bow or fabric, other wise it will look terrible once it gets where it is going. I use Aleene’s Fabric Stiffener. It has Many purposes, but it works Great on hair accessories too. It is rather thick, so I recommend diluting it a little bit with some water, otherwise your ribbon/fabric will be like cement. You can hand paint it on, but what I’ve found the easiest, is that I put it into a water spray bottle (you know the kind they use in the salon to Spritz your hair with water?) and dilute it there. I then set the sprayer to Mist. Before I do any embellishments, once I get the Ribbon or fabric in place, I add a mist of the Fabric Stiffener and let it dry. Once it is dry if it isn’t as stiff as you would like it, you can add another coat. But it is easier to have too little (as you can just do another coating) than too much and try to wash it off. Once the bow or fabric is set and dry, then you can finish off the embellishments and attach it to whatever craft you are creating. Now your craft won’t flatten in the mail or disfigure if it happens to get squished or played with by a little kid, or it gets lost in a drawer…I”m just thinking of all the crazy things my daughter’s hair accessories have put up with over the last 23 months. And the hair accessories that I’ve used this with, still look new…where the others…not so much.
If you have any more tips, that help making our Crafting (for ANY project) easier…PLEASE share! we’d Love to hear from you!
I have a quirky obsession with BBC comedy and classics, Dr. Pepper, and chocolate.
I am passionate about photography, crafting, baking, and helping families make cherished memories from everyday, ordinary moments
She is dedicated to helping you leave a legacy of moments and celebrated milestones for your family to treasure generation after generation.